:quality(75))


:quality(75))


In this tutorial, we'll show you how to vectorize an image in Adobe Illustrator by going through the following steps.
What's the Difference Between a Raster Image and a Vector File?
Raster graphics are images saved as a bitmap, made up of pixels. Vector graphics, on the other hand, are composed of shapes and lines. This means they're much easier to scale without losing quality.
File types like. JPG (or . JPEG), .GIF, and . PNG are raster files, while file types like.SVG are made from vectors. You can also save your files. EPS format, which saves an additional bitmap image of your file, which is helpful for some websites and programs that show a preview of your image.
Adobe has its own file types related to its raster and vector editing platforms:
- .PSD files are raster-based and are for Adobe Photoshop
- .AI files are vector-based and are for Adobe Illustrator. (Spoiler for later - Illustrator isn't the only program that can open. AI files.)
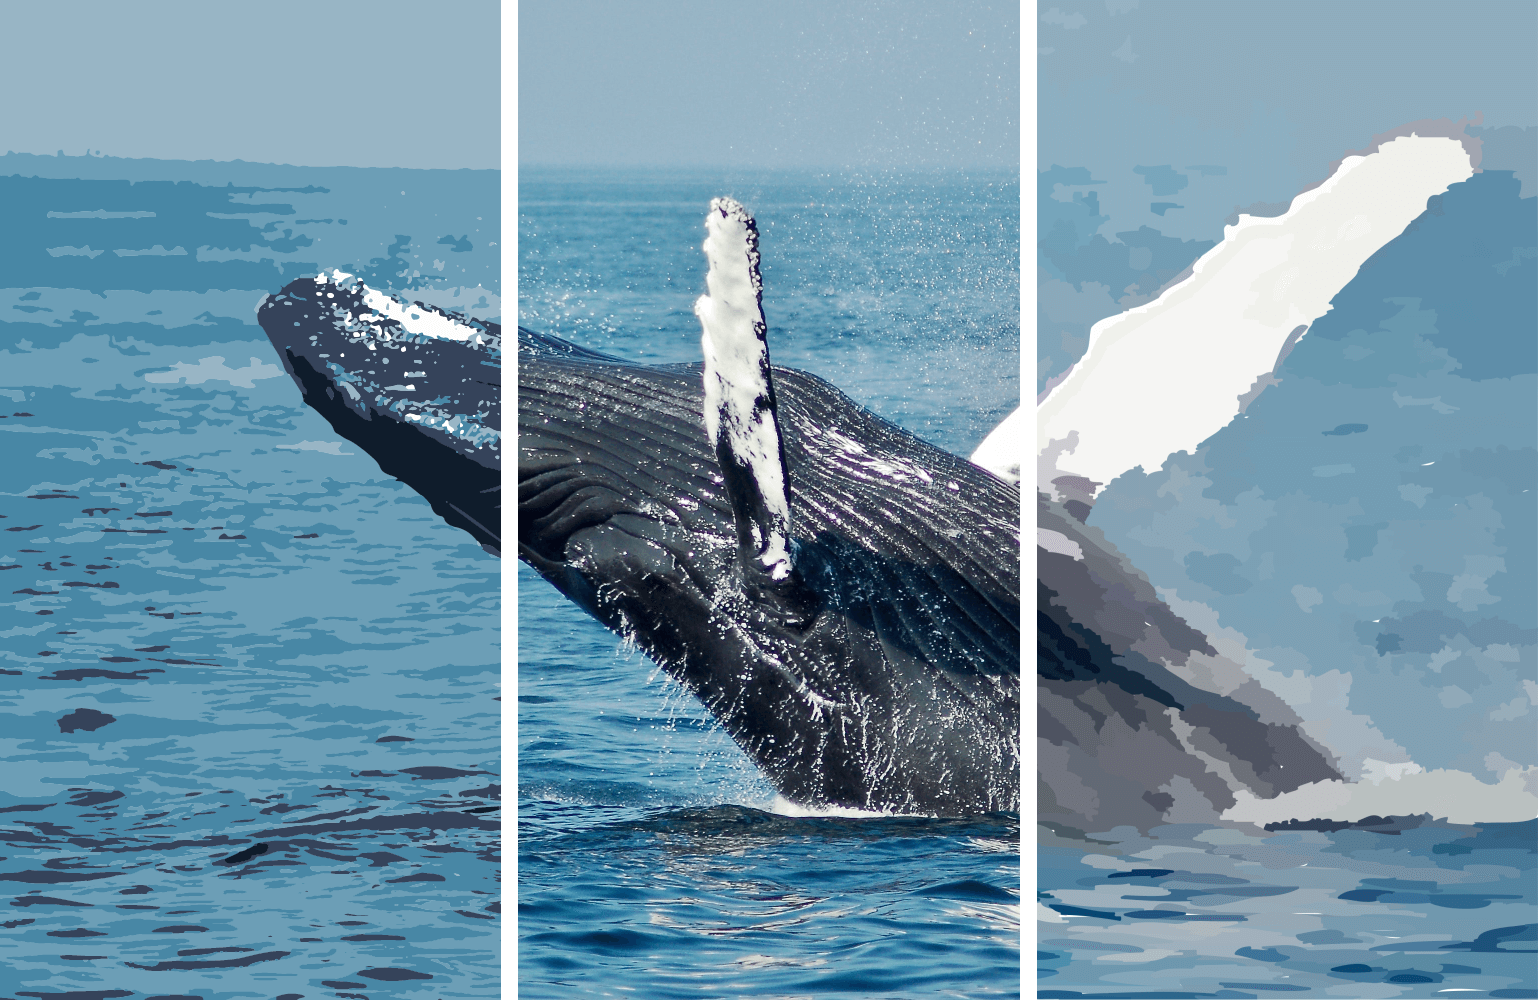
As a computer-generated image, an SVG file is a vector graphic that can be infinitely enlarged without any loss of quality and remain sharp and crisp. It's perfect for website mockups or print designs where you need an image with no physical dimensions but somewhat just a scalable shape with few colors. You might have some raster graphics (like PNGs) that you want to turn into vectors in Adobe Illustrator, so they are high fidelity and easier to work with.
Different programs need to be used for raster graphics versus vector graphics. For instance, if you need to work on or alter raster images, you'll need to use a program like Adobe Photoshop or Procreate. Programs like these can efficiently work with the colored pixels that make up a raster image.
However, for a vector image, you'll need to use a graphic design program designed to work with files in a vector format.
Creating a New Document
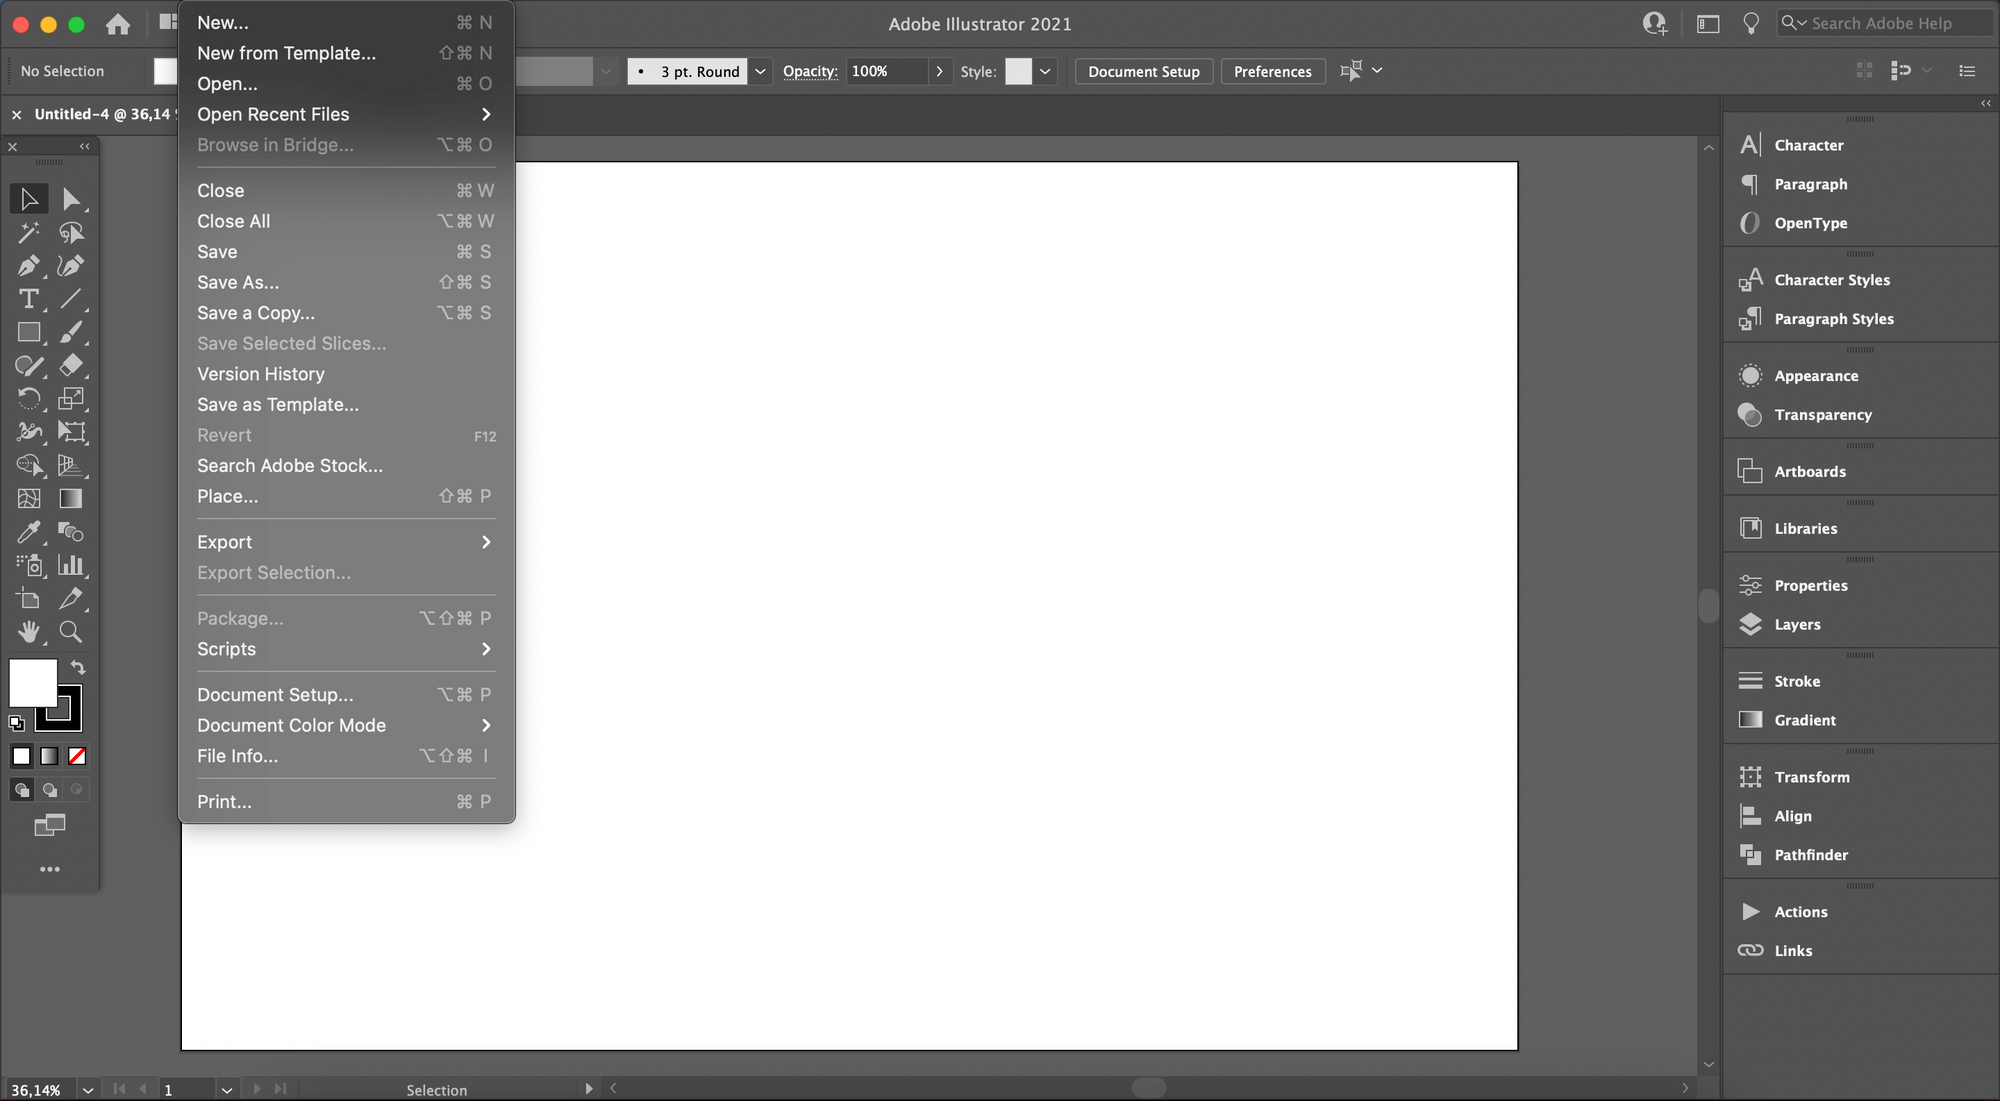
First, you'll need to create a new document in Illustrator. To do this, go to File > New. Ideally, you should create a new document with an artboard with the exact dimensions of the image you intend to vectorize, but this isn't necessary.
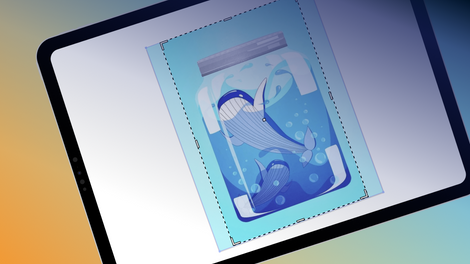
Importing your Image into Illustrator
Next, import your image file into Illustrator by going to File > Place. Then, you'll need to use the anchor point controls to resize your image to the size you want. You can also do this by creating an empty frame that is the correct size and placing the image into that frame.
Vectorizing your Image with Image Trace
The next step is vectorizing your image. Select your image, then open the "Object" menu. Click on "Image Trace" and then "Make." "Alternatively, depending on which version of Illustrator you have, the "Image Trace" option might appear at the screen's top or right-hand side when your image is selected.

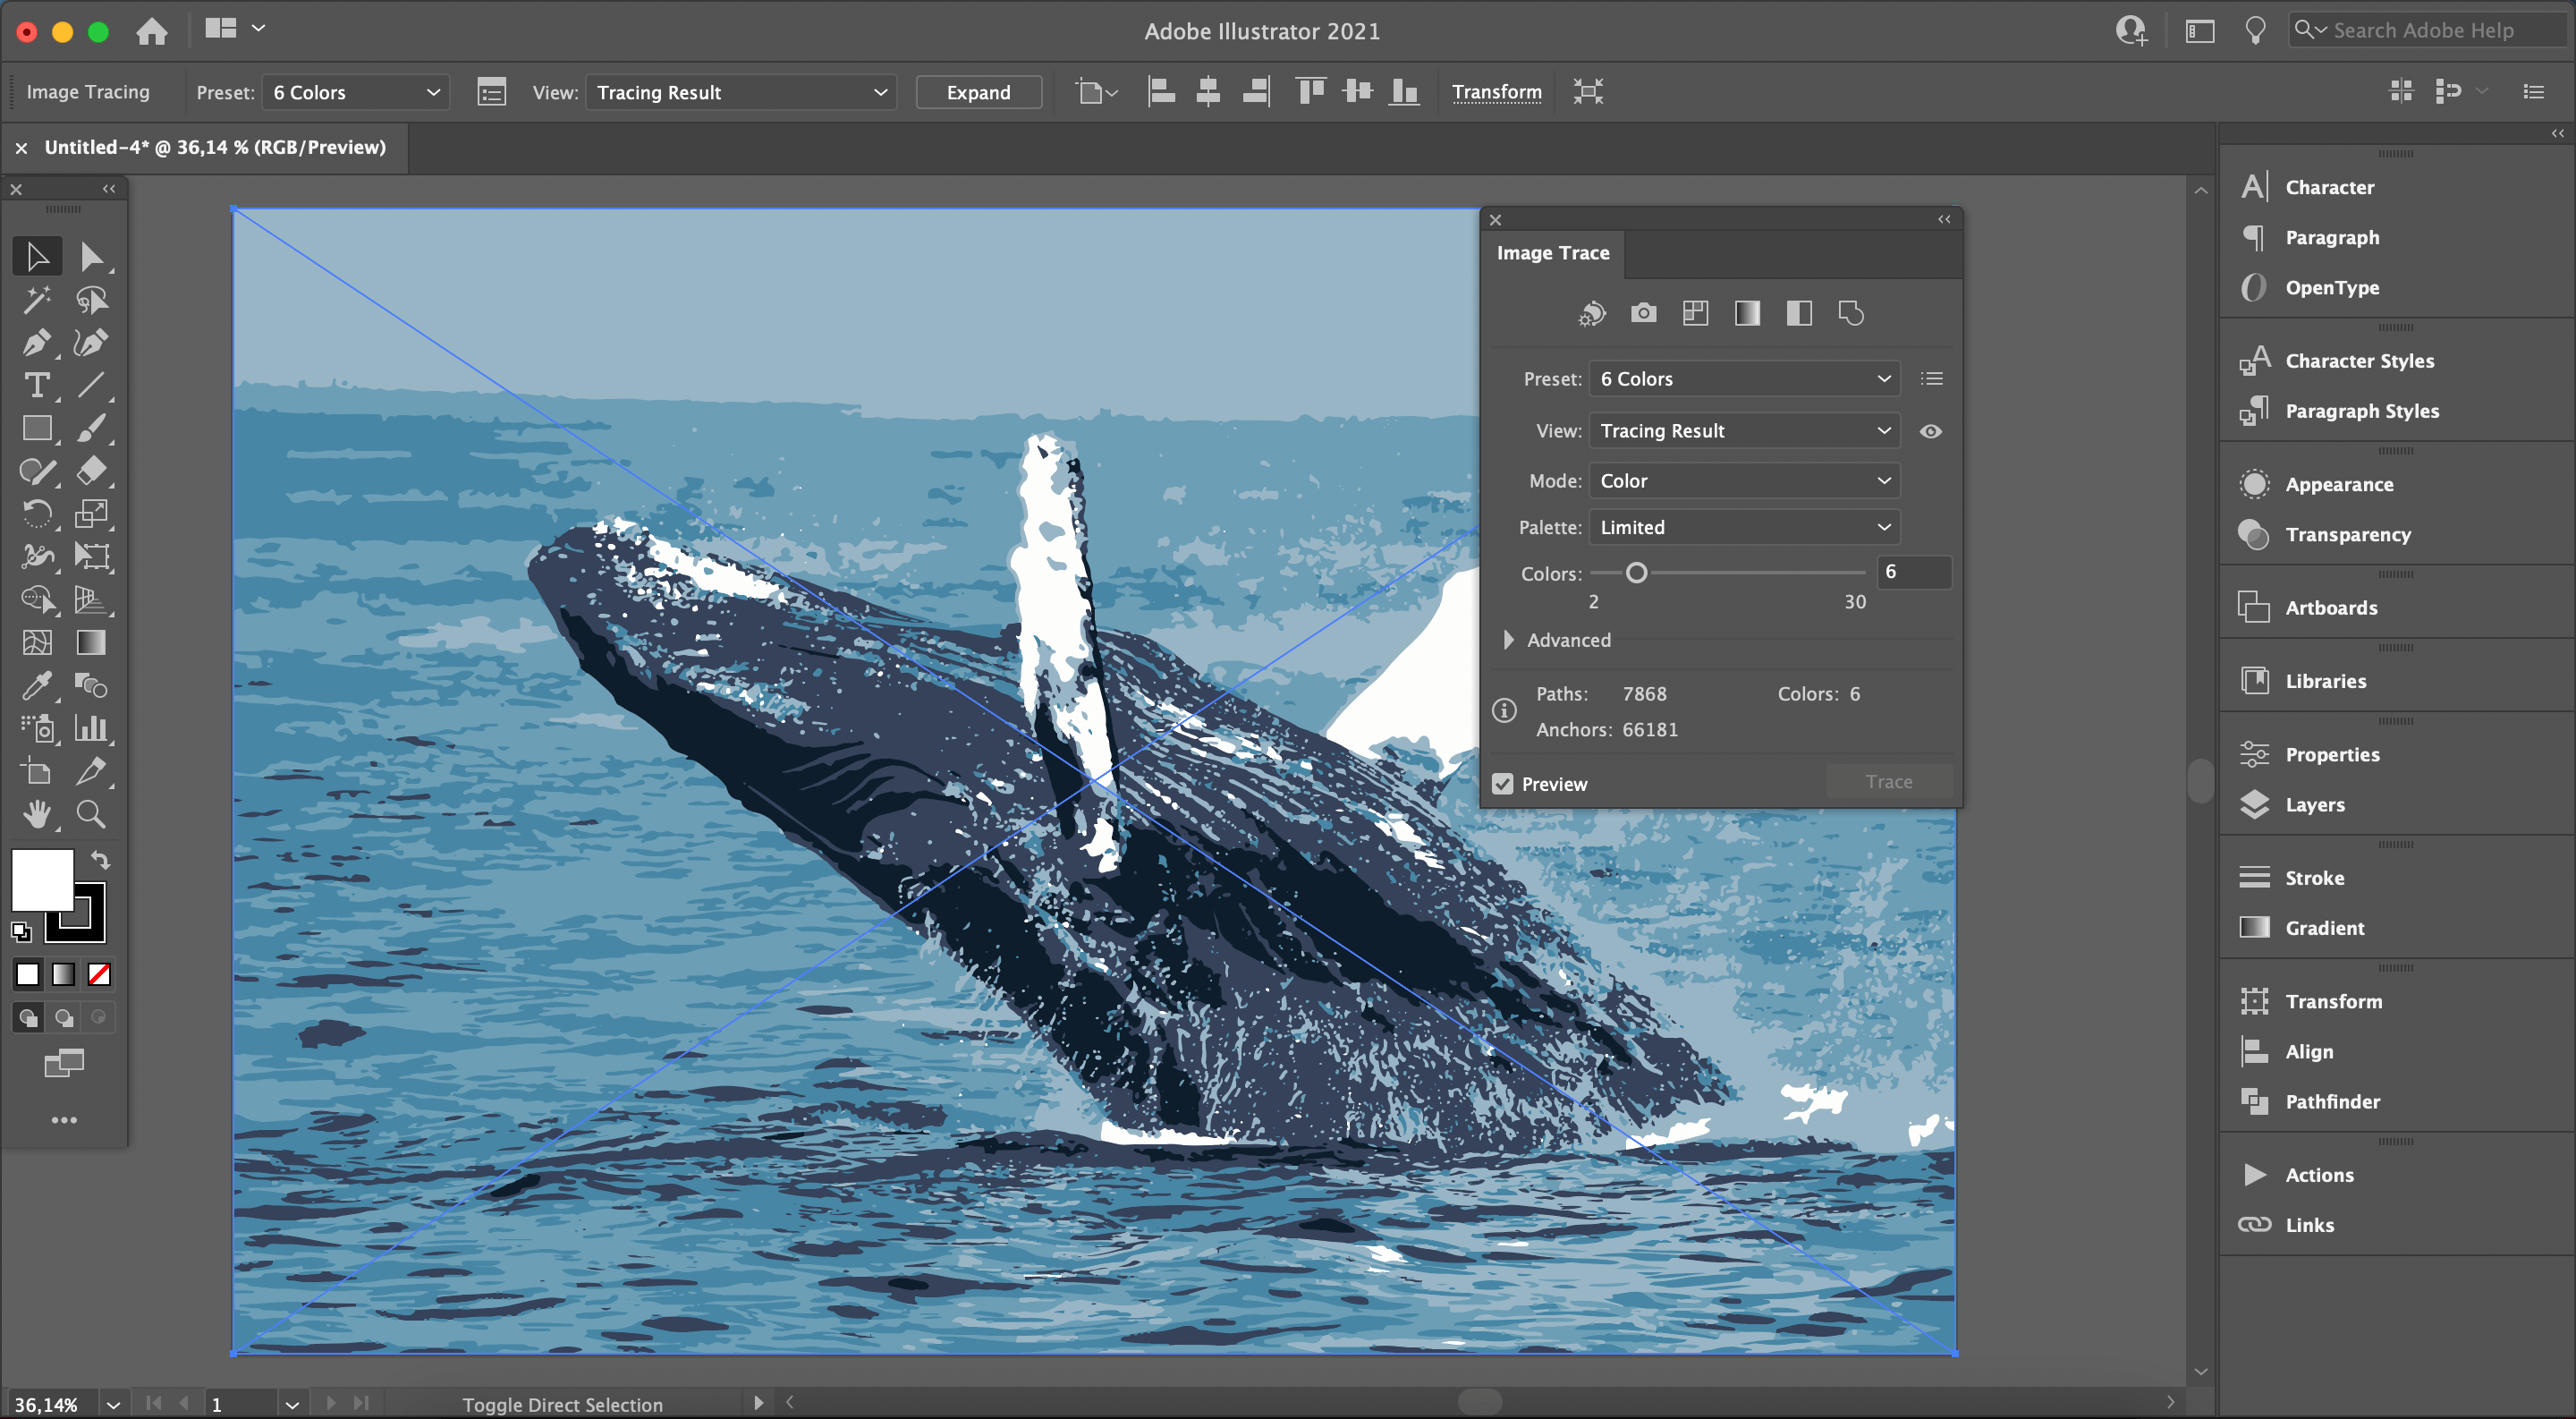
Next, decide which preset option you want to create your image. There are many options for the number of colors you want in your final image, including 3-color, 16-color, and high- and low-fidelity photos. There is also the grayscale option, which will use only shades of gray for your image, and the silhouette option, which creates a black and white image. The colors of your image will depend on the option you pick. Click on the option you want to use. The image trace will begin immediately but might take a few seconds to complete.
Fine-tune your Image
The next step is to fine-tune your vectorized image. There are several options to do this. First, open the Image Trace panel from the drop-down menu window. From here, you can access various tracing options, which will allow you to alter the colors of your image trace and the level of detail. Once you're happy with how the preview looks, click "Expand." This will finalize the image trace and transform your raster image into vector shapes.
Ungroup the Colors
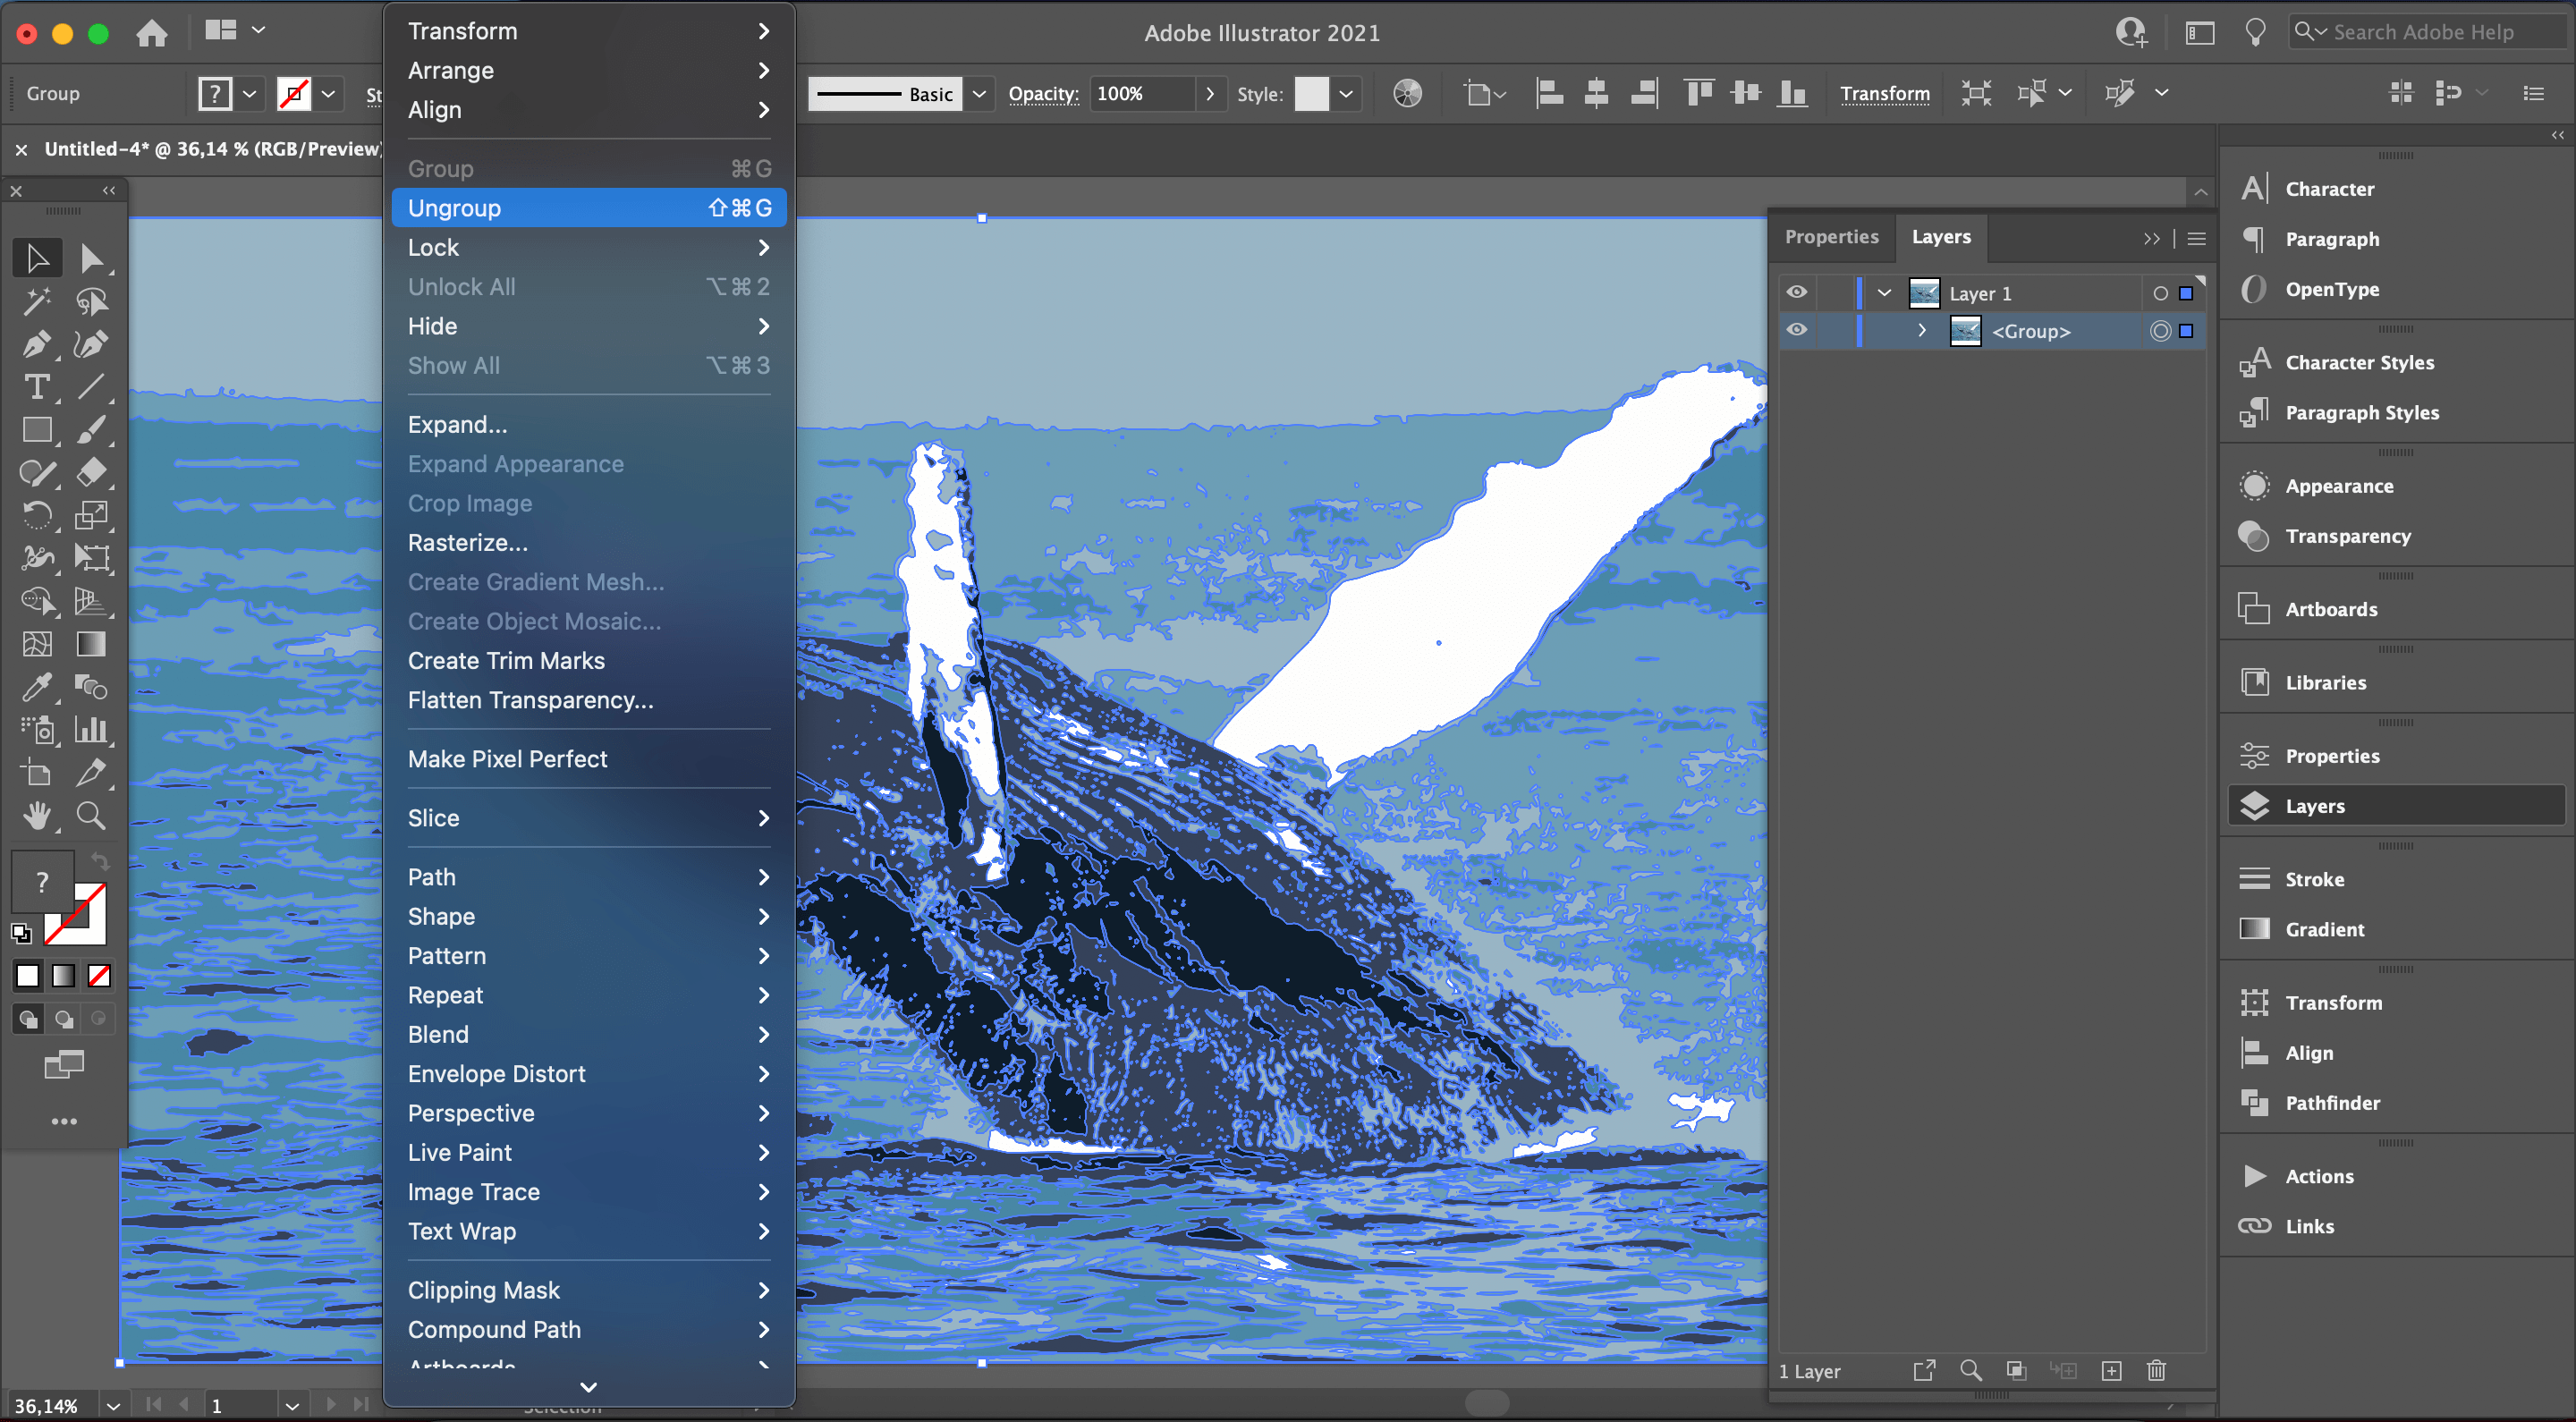
Next, you'll want to select your image. It will appear as a collection of different vector shapes in many colors. These shapes will initially be grouped. To make individual changes to these shapes, you'll need to ungroup them first. This will allow you to move and change each shape on its own. You can add or delete anchor points from the shape, choose a new fill color, or even apply a gradient. You can also use your pen tool to alter its shape if it doesn't look quite right.
Save your Vector File
Once you've adjusted your vectorized image to your satisfaction using the presets, tracing options, and Pen Tool, it's time to save your new vector project. Use the File drop-down menu to save your project. Then you can use the Export feature to save your vector image in the file type you want.
How to Vectorize your Image Faster Next Time
Adobe Illustrator is good at transforming raster images into vector images but has some issues. First, it's an expensive platform, which puts it out of reach for many people. Second, it's very complicated, and figuring out how to navigate all the ins and outs of its image tracing process can be very difficult, even with a guide like this!
Thankfully, there's another option: Vectornator!
Just open your image as a new document in Vectornator, or import it onto an existing Artboard. Make sure that the image layer is unlocked by using the Layers Tab. Then, select your image. The Auto Trace panel will appear instantly at the Style Tab's top.
From there, you can adjust the two sliders to change how detailed your new vector image will be. Then, just hit the Auto Trace button and BOOM! Your image will be transformed into vector shapes.

For a more detailed explanation, visit our Learning Hub ➞ Happy Vectornating!
How to Vectorize an Image in Vectornator
In Vectornator, you can seamlessly convert imported raster digital images into vector shapes with our powerful and updated Auto Trace feature. The feature is available for both Vectornator for iPad and Mac. You can turn sketches and photographs into infinitely scalable crisp vector images with precise feature controls within seconds. The entire process takes only a few seconds; converting an image into paths has never been faster and easier. This is the ultimate evolution of image tracing.
Convert Sketches into Vectors
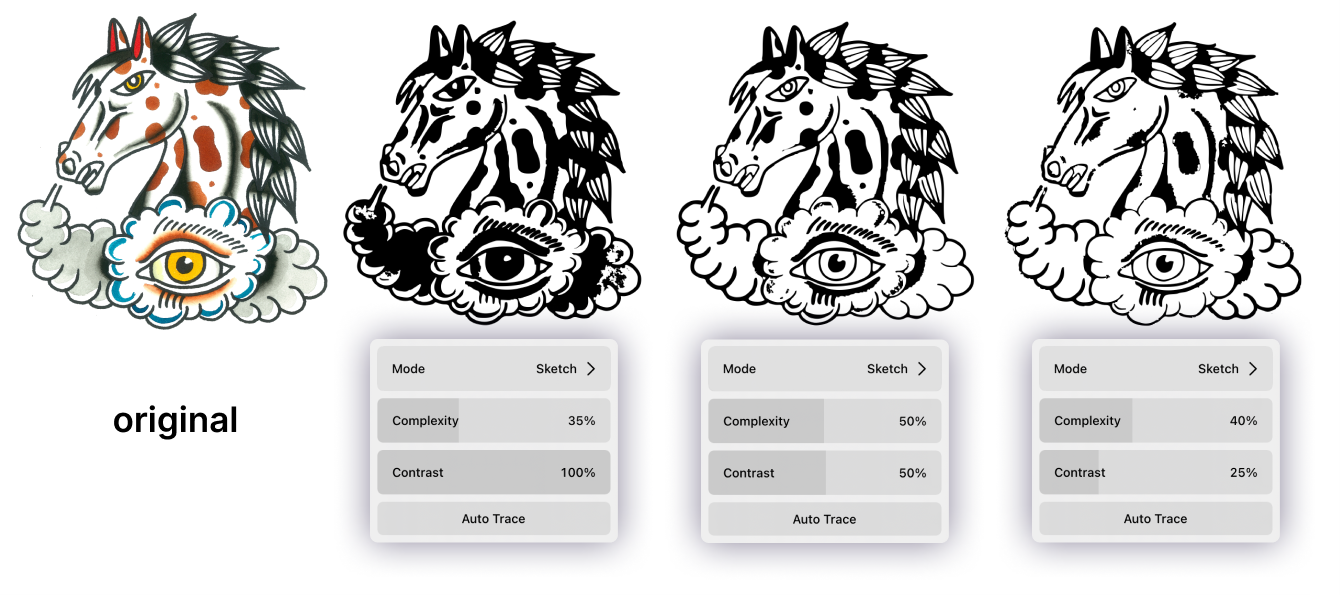
Our Auto Trace feature offers Sketch Mode, a tracing mode specifically developed to trace and convert sketches into crisp vector shapes. The tracing feature will perform a source image analysis, resulting in ultra-precise results. You can convert technical drawings or freehand drawings into vector shapes.
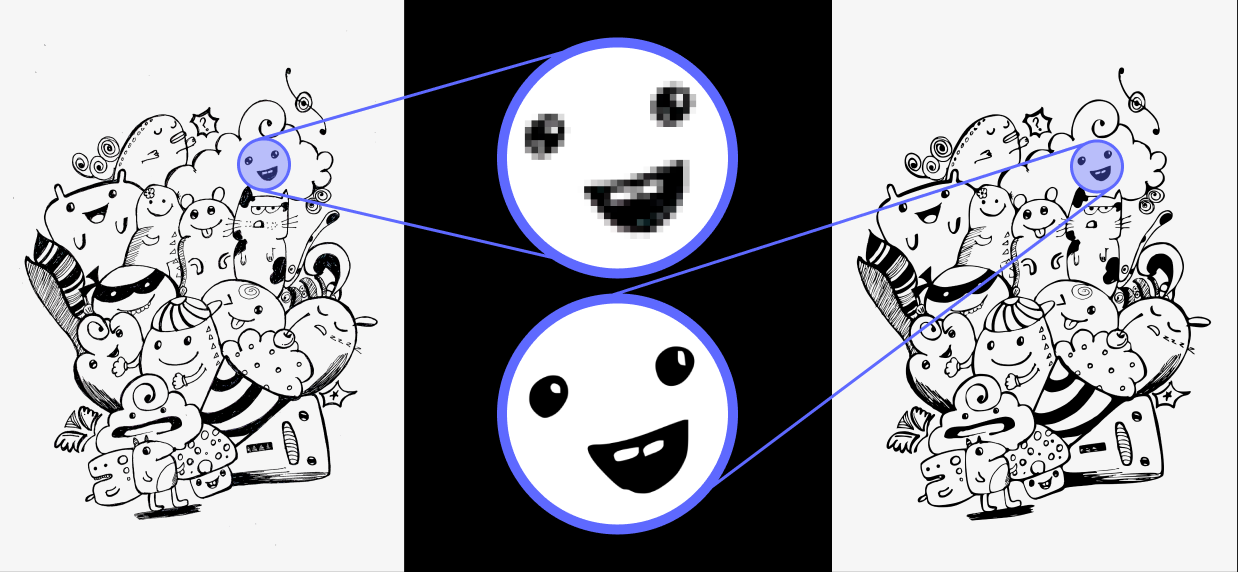
Precise control sliders will give you the ultimate control of your vectorization settings.
- You can control the grouping behavior of the resulting vector shapes with the Complexity Slider.
- A lower complexity value smoothes the outlines and gives you a more abstract result; a higher value will retain more details in complex images.
- The Contrast slider defines the threshold at which color is defined as black or white. Adjusting the slider can result in dramatic differences in the look and shadow behavior of the final result.
With our 4.8.2 update, we’ve included even more options for the optimal tracing results of your sketches:
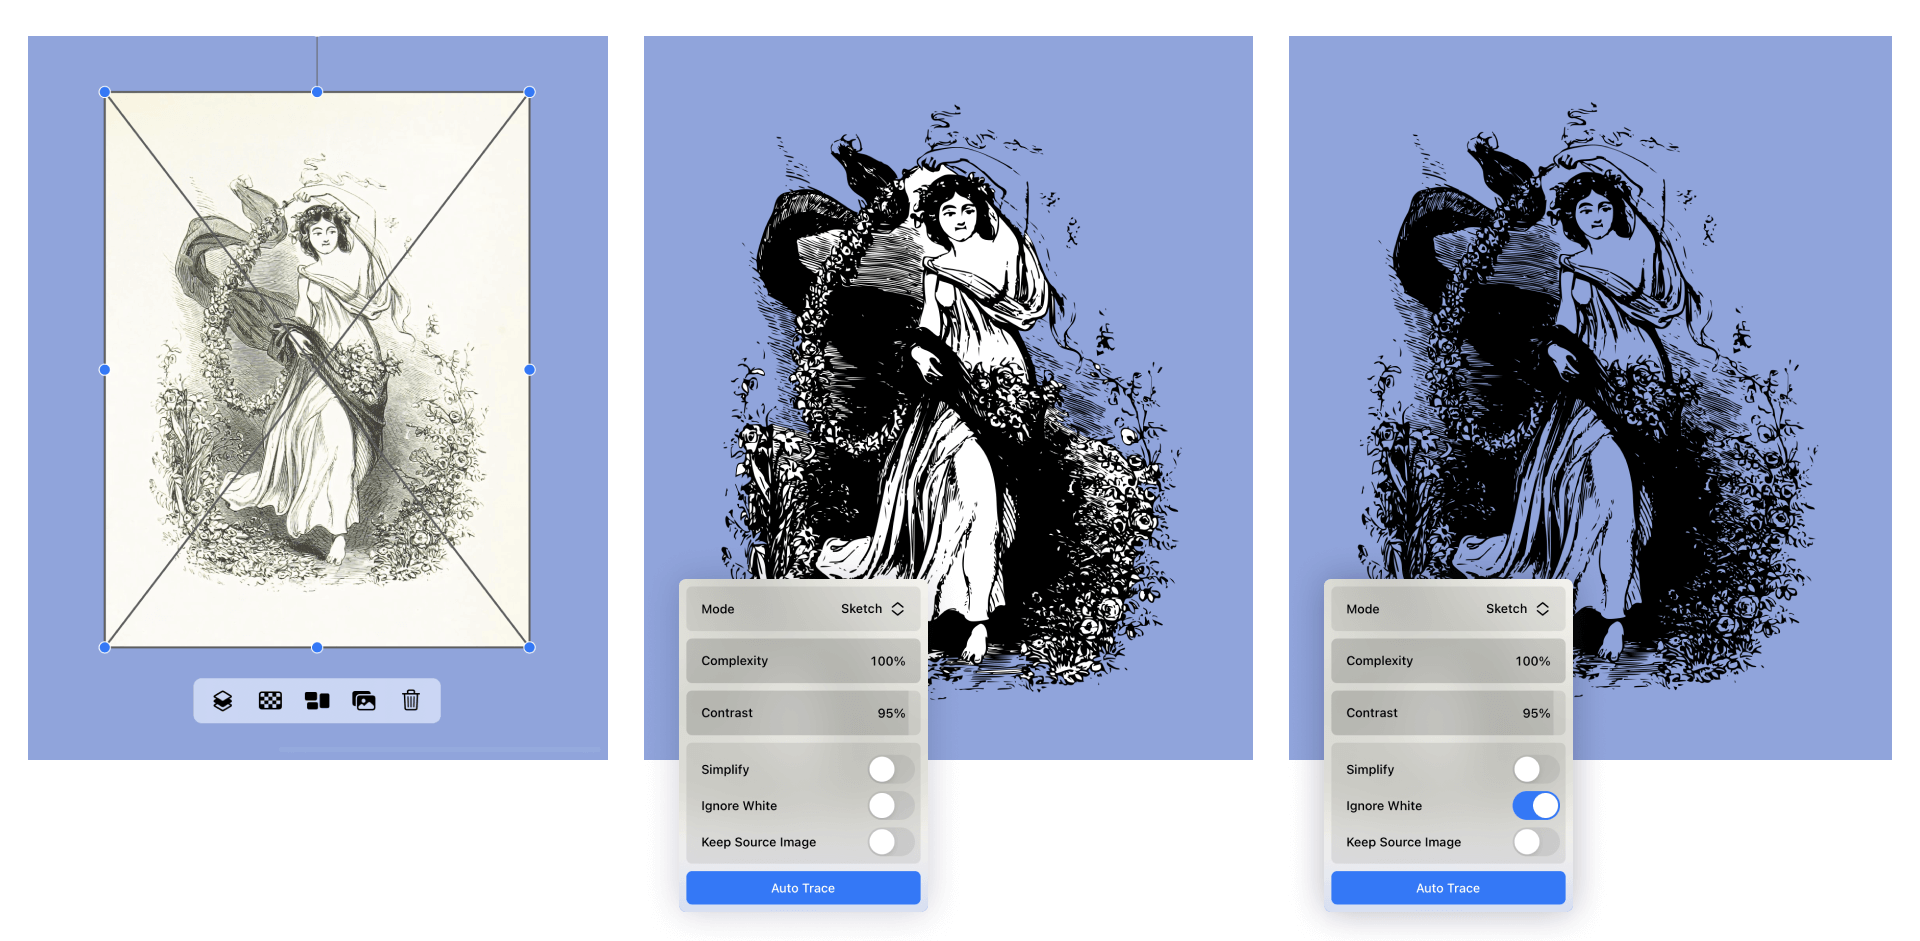
- The Simplify toggle is optimal for tracing an image with simple, uncomplicated shapes, as Auto Trace will create significantly fewer nodes in the resulting traced shape when activated.
- With the Ignore White feature, you can define if Auto Trace creates vector shapes out of white image areas or not. When Ignore White is turned on while in Sketch Mode, all the white areas of the source image will be erased.
- The Keep Source Image toggle will define if the original image will be kept after finishing the tracing process. If the original image is saved, it will be organized below the newly traced image in the layer hierarchy.
This is every graphic designer's wet dream; a tracing feature specifically created to turn your common drawing into detailed vector images. Gone are the days when you had to import your sketch and redraw and adjust the paths for hours on your design app. With Vectornator Auto Trace, you have to make just a few slider adjustments, one click, and you’ll get a stunning vector image, a complex artwork displayed on your screen! The results are so accurate that the final vector images need minimal to no adjustment after the tracing process.
Turn Photos into Abstract Vector Paintings
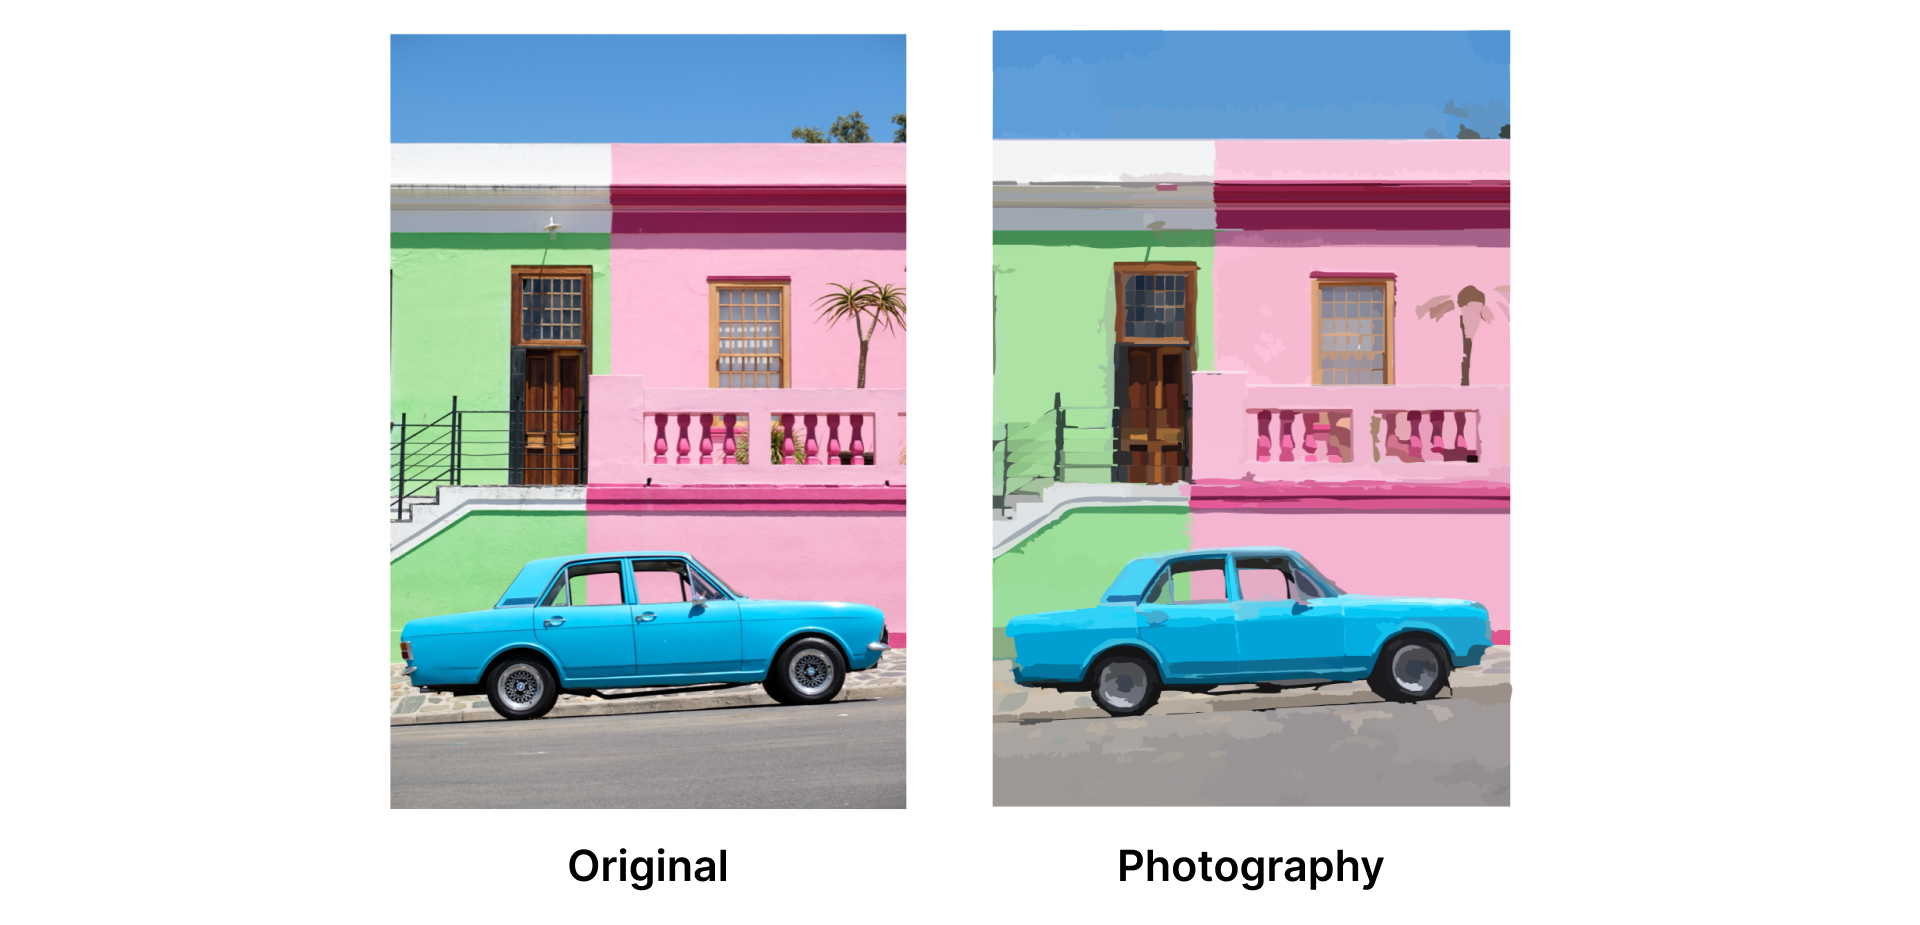
Another tracing option of Vectornator is the Photography Mode. This tracing option was explicitly developed to convert photos into vector shapes. It turns any imported Photo into a painting-like vector image. The context-aware panel contains two adjustable sliders:
- The Complexity slider defines how many paths your vectorized image will have. A lower value will give you a more abstract result, and a higher value will result in a more detailed path.
- The Path slider sets the threshold for your path size. A higher value creates longer paths between points, resulting in a less detailed image; a lower value will generate shorter paths between points, producing a greater level of detail.
After the tracing process, every singular patch, the newly created vector image, can be adjusted by changing its color and opacity. An outline can be added as a bright stroke color. These adjustments can change the look of the vector shape dramatically.
Vectornator developed these two tracing modes specifically for your source image type. This will result in unmatched tracing results in precision and outcome quality. The resulting vector shape can easily be modified with the many intuitive and powerful tools of Vectornator.
The tracing process in Vectornator is incredibly fast, and the Auto Trace feature menu is so simple and intuitive that you can achieve high-quality tracing results with few adjustments.
The possibilities to create vector masterpieces with raster source images in Vectornator are limitless!

Share this!
Marion Gerlinger
Marion is a contributing writer to the Linearity Blog.